
GLSS + KURE USER MANUAL
GLSS USER MANUAL
Login Details
Username:
[YOUR EMAIL ADDRESS]
To sign into your account and set your password, please click on the following link: [UNIQUE LINK]
Please note that this link expires 24 hours after you click it.
After this first login and password setup, you will use this link for all future logins: https://glss.litmos.com
If you’re having trouble or have any questions about your account/course access, please check our Support Center.
Happy Problem Solving!
- The GoLeanSixSigma.com Team
View Your Courses
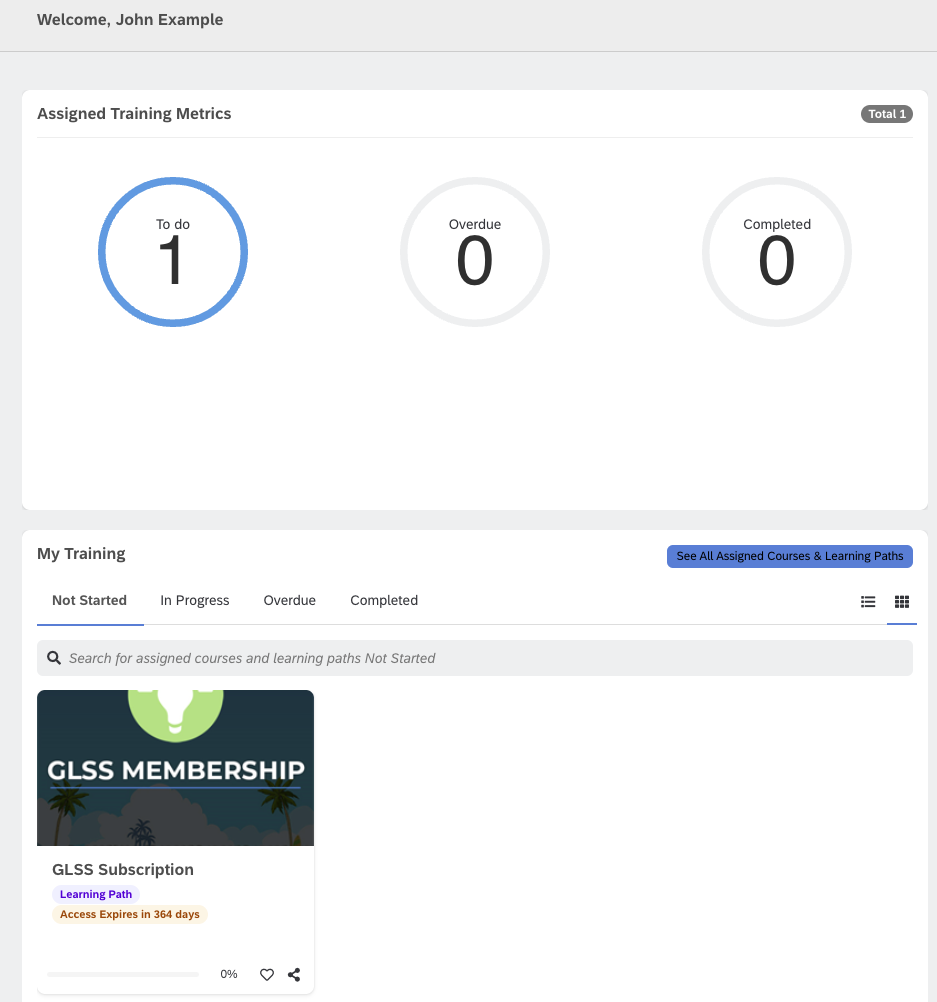
Once your account is set up, you’ll be directed to view your Dashboard.
Scroll down to “My Training” in the 2nd widget. (see screenshot)
Ensure you're in the “Not Started” Tab of the widget.
Please check the “In Progress” tab if nothing is shown.
From there, you’ll find the GLSS Subscription Learning Path.
Click on the Learning Path, and you’ll find all of the courses available to you.
Once you start your training, you can find the Learning Path in the “In Progress” tab.


KURE USER MANUAL


Invite Others to Your Team
There are a few ways to invite others to your Project Team:
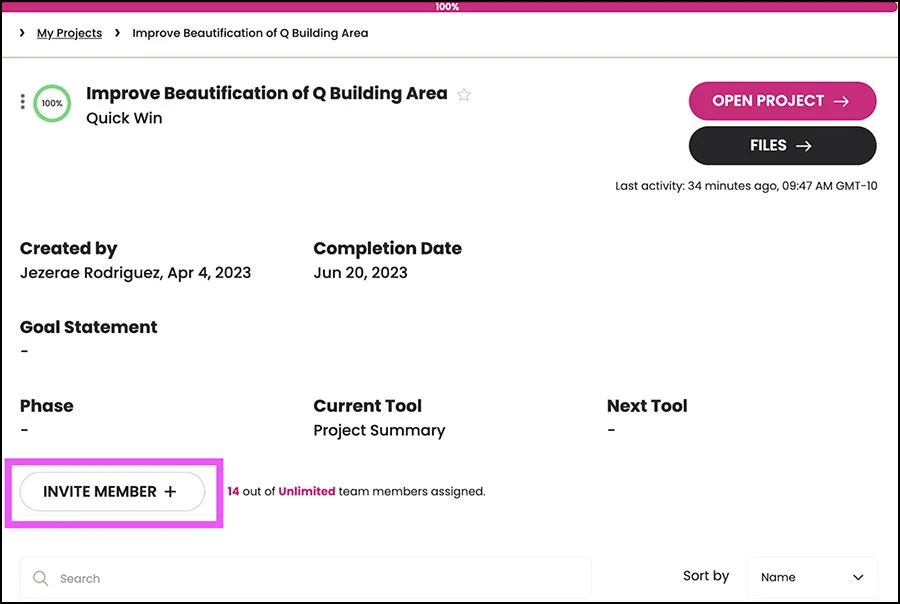
Invite through the Project Detail View:
Open your project’s “Project Detail View” by searching for your Project in “My Projects” and clicking the Arrow >
Once your Project Detail View opens, click the “INVITE MEMBER” button
A modal will pop up for you to enter their email addresses to send them an invitation directly to the Project
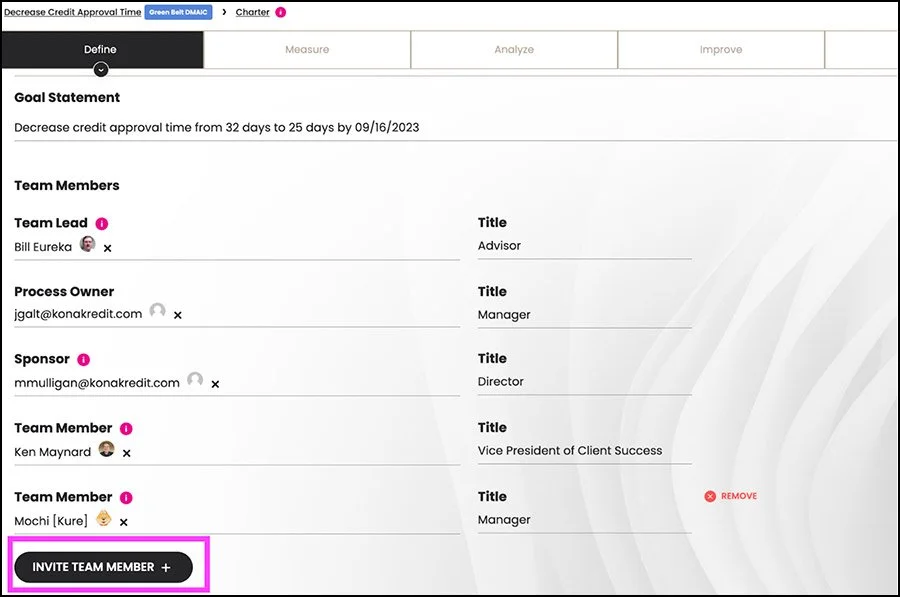
Invite through the Project Charter:
As you work through your Charter, you will be asked to name your Team Lead, Process Owner, Sponsor, and other Team Members
You will be able to invite them via the Charter Inputs
In the Charter Summary, you will also be able to invite others by clicking the black button “INVITE TEAM MEMBER”
Leave Comments in Projects and Tools
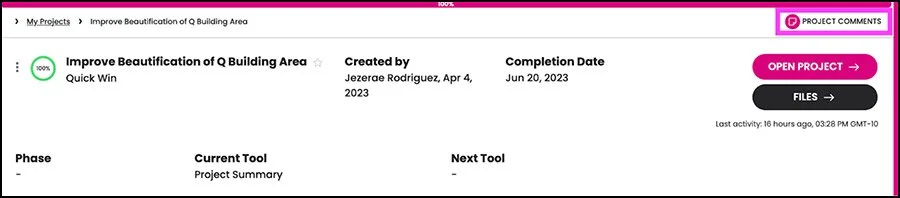
Open your Project.
In Project Detail View:
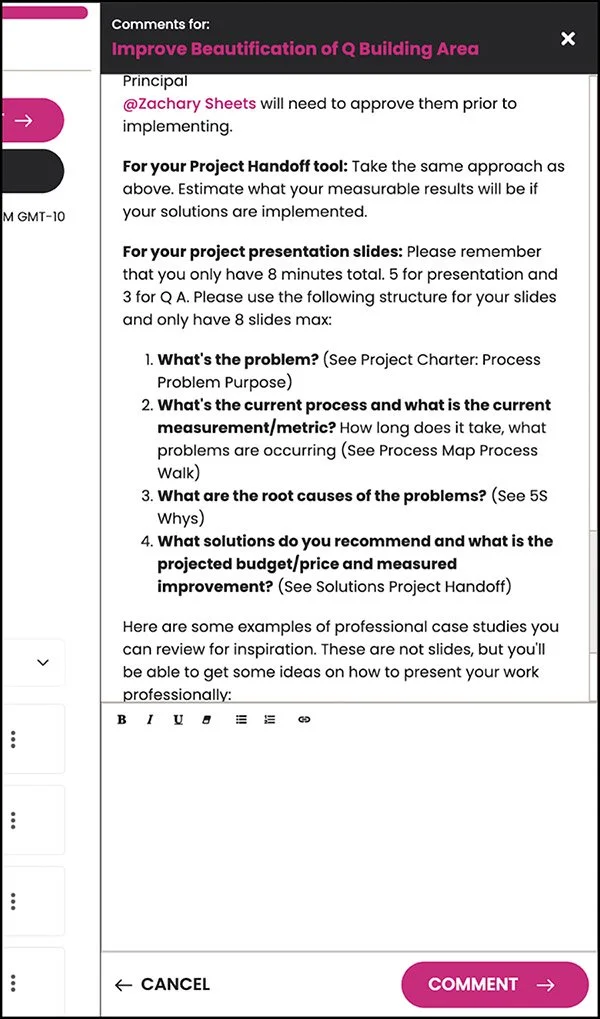
Click “PROJECT COMMENTS” in the upper right corner
The comments screen will expand, and you can write your comment
Tag (@) your Team to direct messages to them within the comments
You can edit your text (bold, italic, underlined) and even add bullets and links by using the editing tools within the comments
Within each tool:
Open the tool within your Project
In the upper right corner, you will see a “note” icon
Click the note icon to open and a drop down will appear
Click “Open Comments” to open the comments for each tool
See the instructions above on how to leave comments
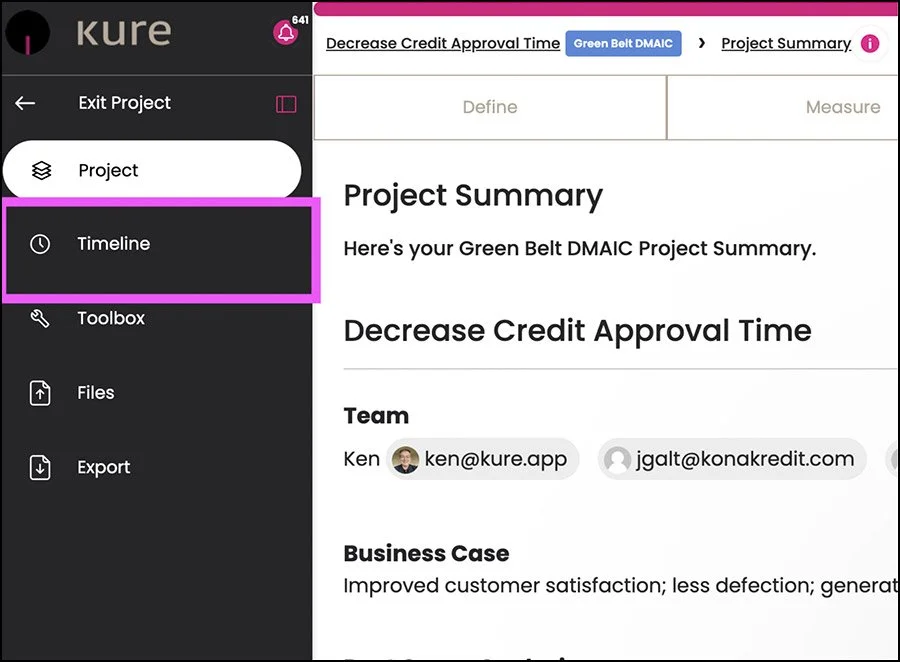
View Project Timeline
Project Detail View:
Open your Project
On the left side, a new set of options will appear
Click on the “Timeline” Button to open your Timeline
Your Timeline will pop up and you can use the “Edit” button on the top right hand side to edit your dates.
The Timeline will provide you with Targeted dates best suited for your Project completion date (that you entered in your Charter) as well as best practices.
Notifications will be sent out to anyone you assign a Tool to.
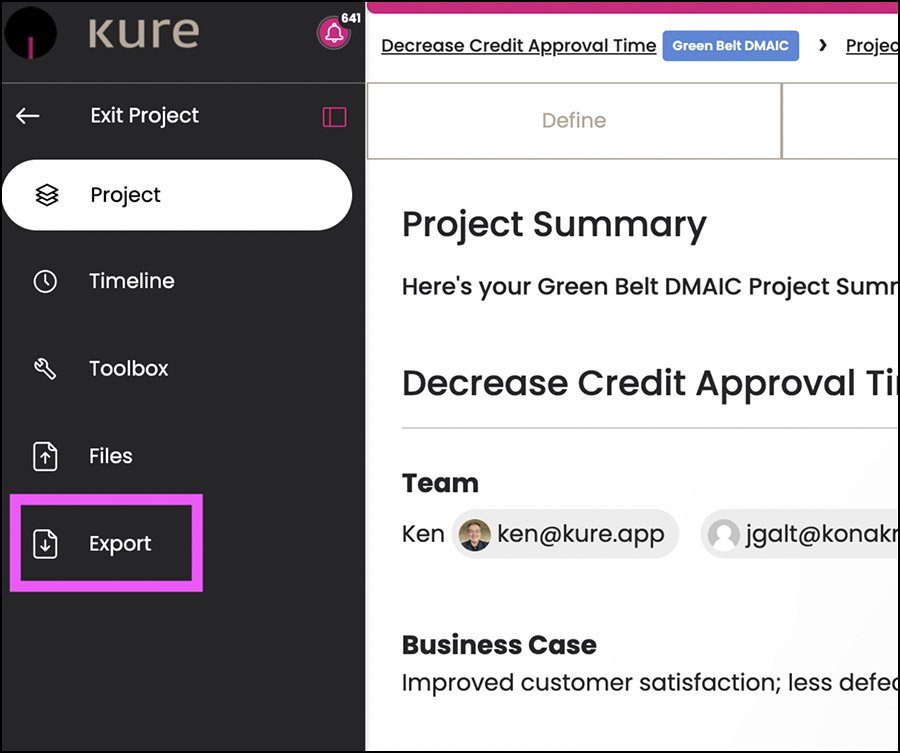
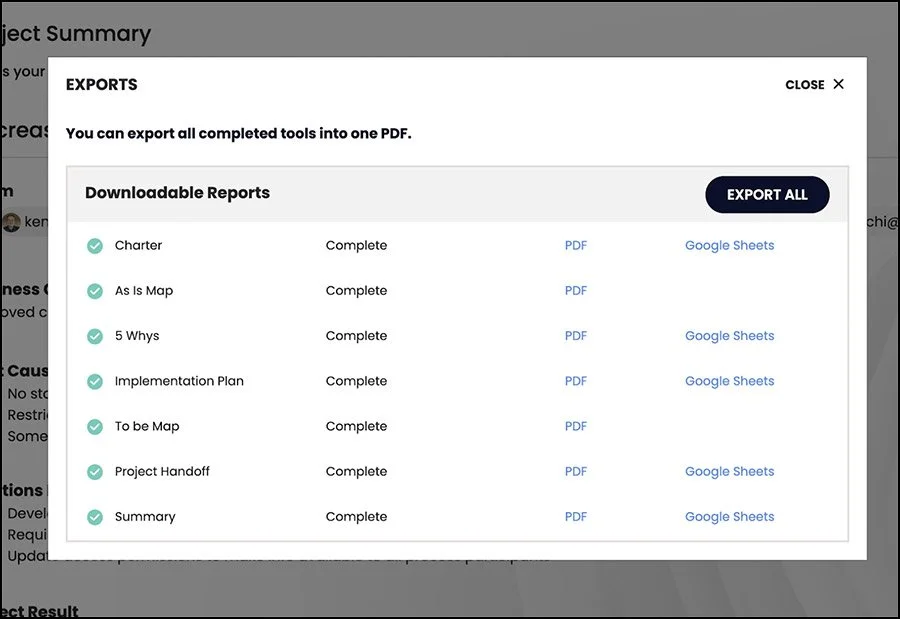
Export your Project Tools and Project Summary
Open your Project
On the left side, a new set of options will appear
Click on the “Export” Button
A pop-up will appear that will show all available tools (completed tools) that can be exported
Click on the blue link to download either a PDF or upload to a Google Sheet
You can also click the “EXPORT ALL” Button to get all of them Exported at once!
Download Your Certification and Badge
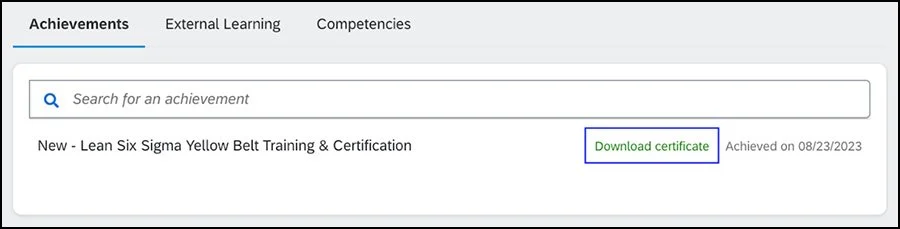
Once you’ve completed a course, your certificate will be available for you to download on the main Dashboard
Click on “Achievements” from the homepage
Click “Download Certificate”
To download your badge, click here.
Simply right-click your desired badge to save to your computer and you can then use it however you’d like.
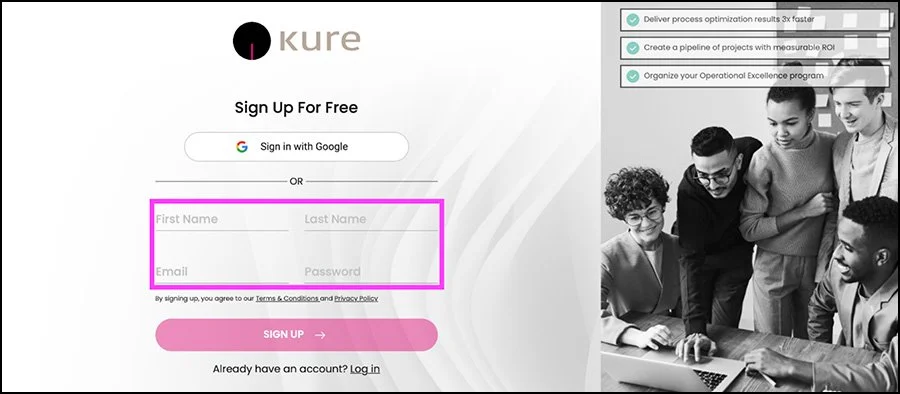
Register for Kure
Enter First and Last Name, email address, and create a password
Your email and password will be your login credentials
Create your Organization name
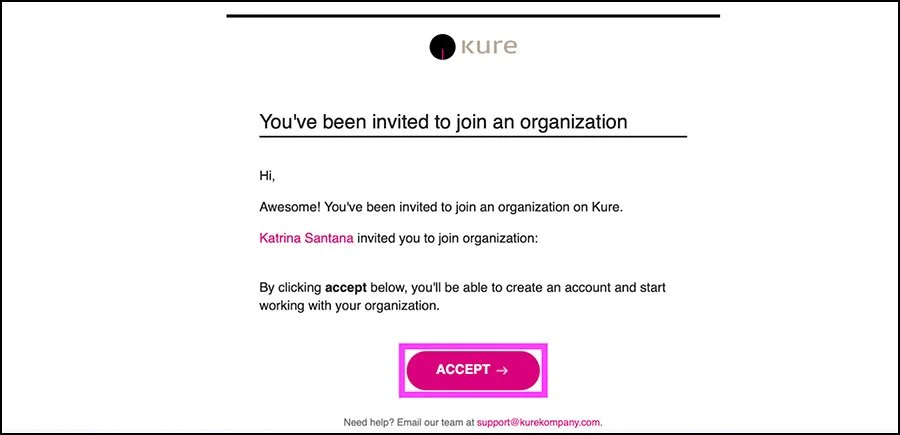
Accept an Invitation
Log in to your email account
Locate the email from Kure inviting you to join an Organization
Click Accept and create login credentials
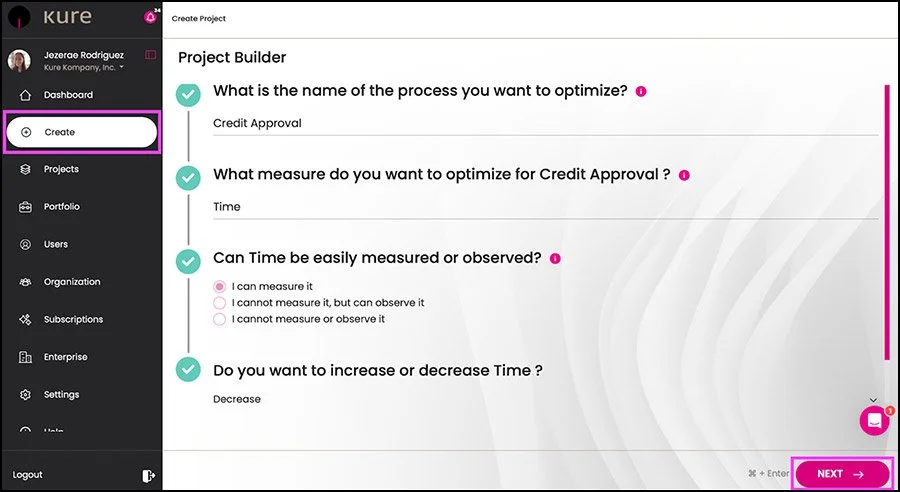
Create a Project
Click on Create from the side menu
Name the Process you want to optimize
Identify the Measure you want to optimize
Determine whether you can easily measure or observe your Measure
Identify what you would like to do with your Measure (increase, decrease, improve, etc.)
Click Next on bottom right corner
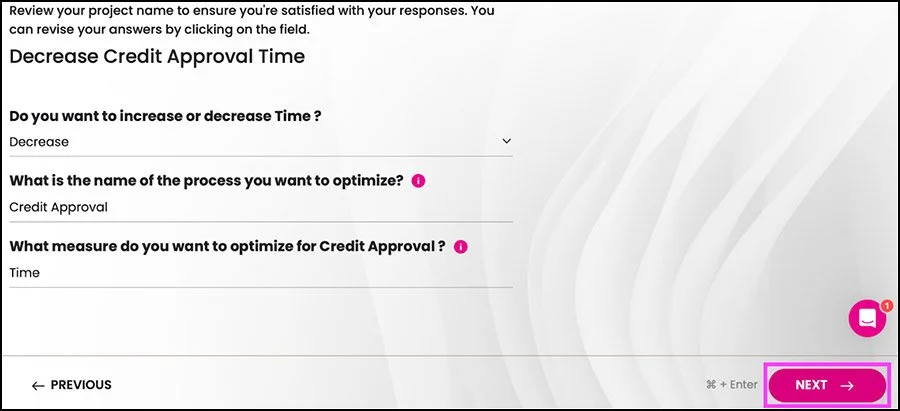
Review your project name and make any revisions (Click Next when finished)
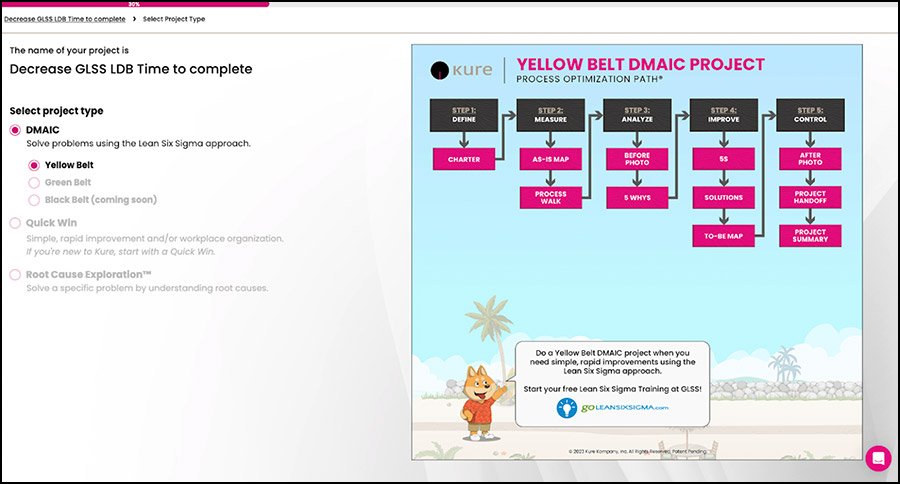
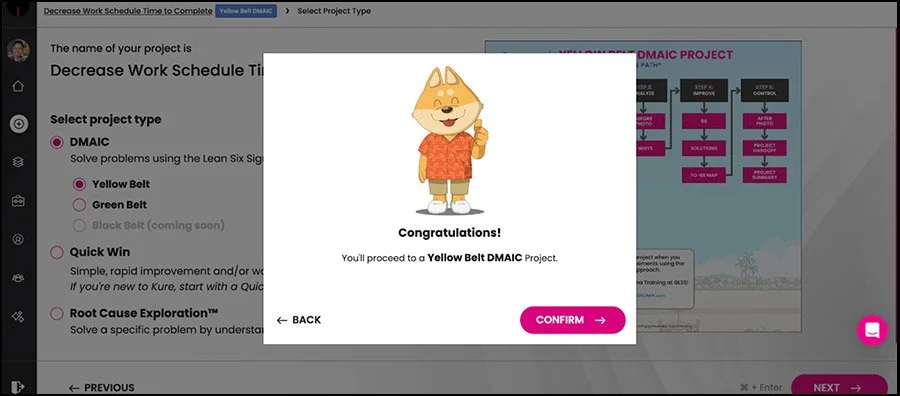
Select project type: DMAIC, Quick Win, or Root Cause Exploration (Click Next when finished)
Click Confirm on the pop-up to proceed
View Projects
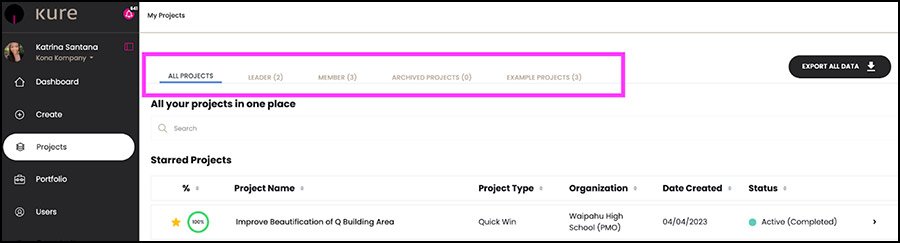
Click on My Projects from the side menu
Click on each Tab to view:
All Projects: Every project you are a part of
Leader Tab: Projects you created and/or lead will be displayed here
Member: Projects you are a team member of will be listed here
Example Projects: Projects that you can view as an example
Select your Project by clicking on:
Project Name: This will take you to the last tool that has been worked on or the Project Summary if the Project is complete.
Arrow >: This will take you to the Project Detail View
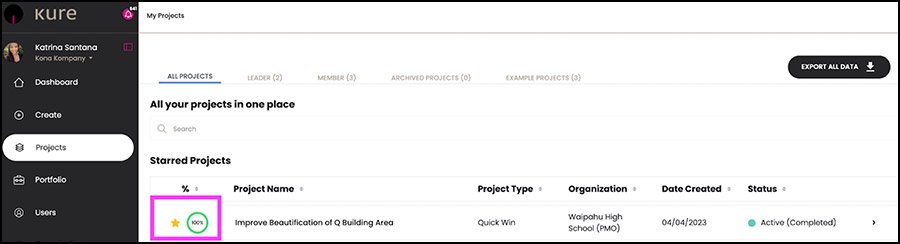
Do you have multiple priority projects that you want to focus on? You can easily star projects to pin them at the top of your project list.
Accept your Invitation to the Training through the Welcome Email
You should receive a Welcome Email (example shown below) from us giving you the information and links you need to access your account.
Click on the link to sign in and complete your account set up
You should now have access to your account and all of your courses
Start Your Training
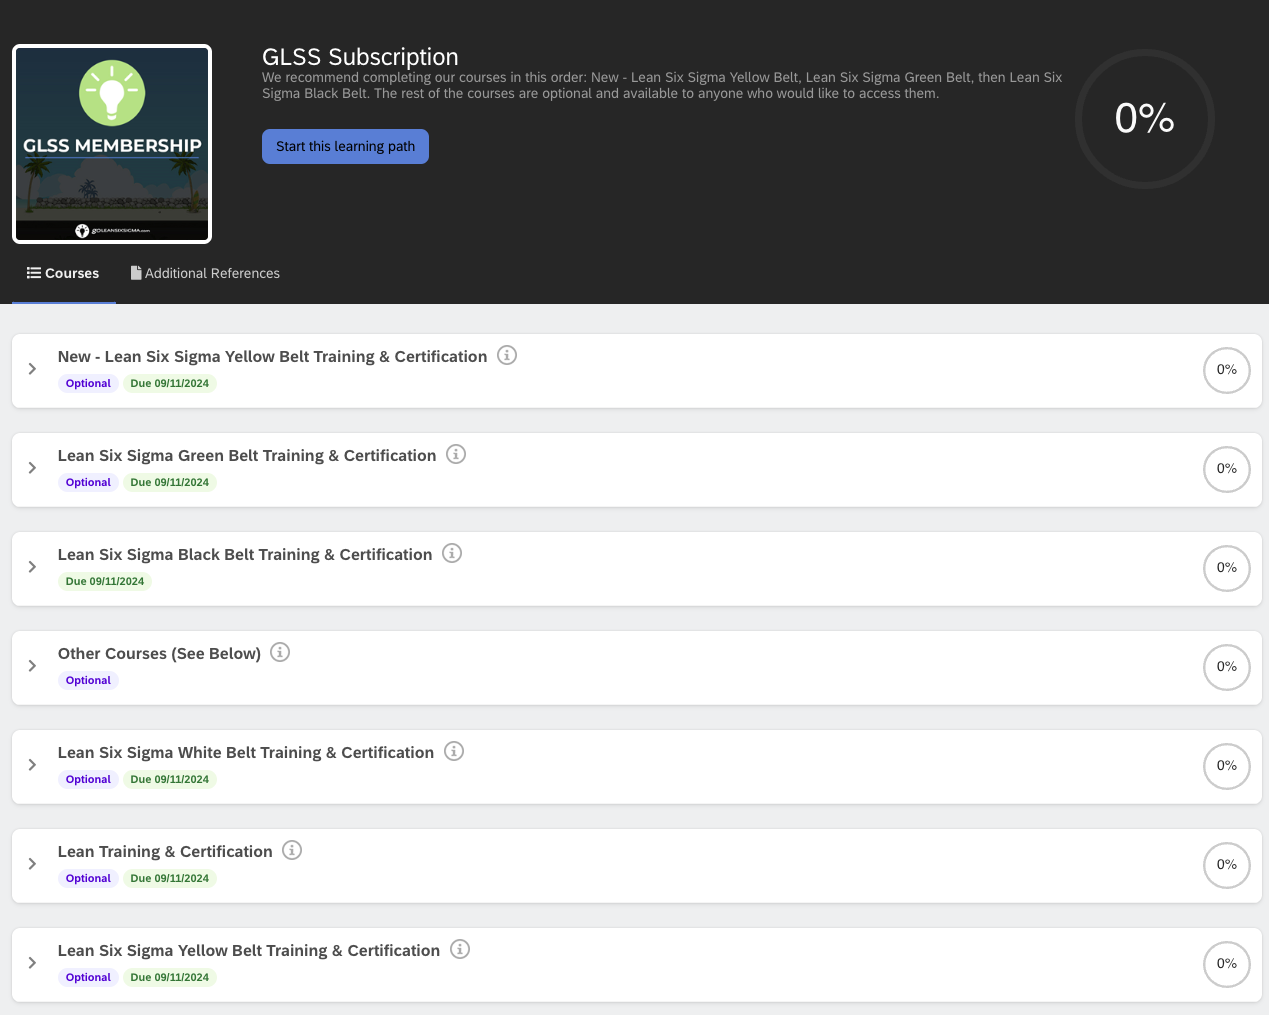
If you’ve started the training before, click on “Continue this Learning Path” to continue where you left off.
If you are just starting, click on the name of the course to close the accordion for a clear view of all the courses. (see screenshot)
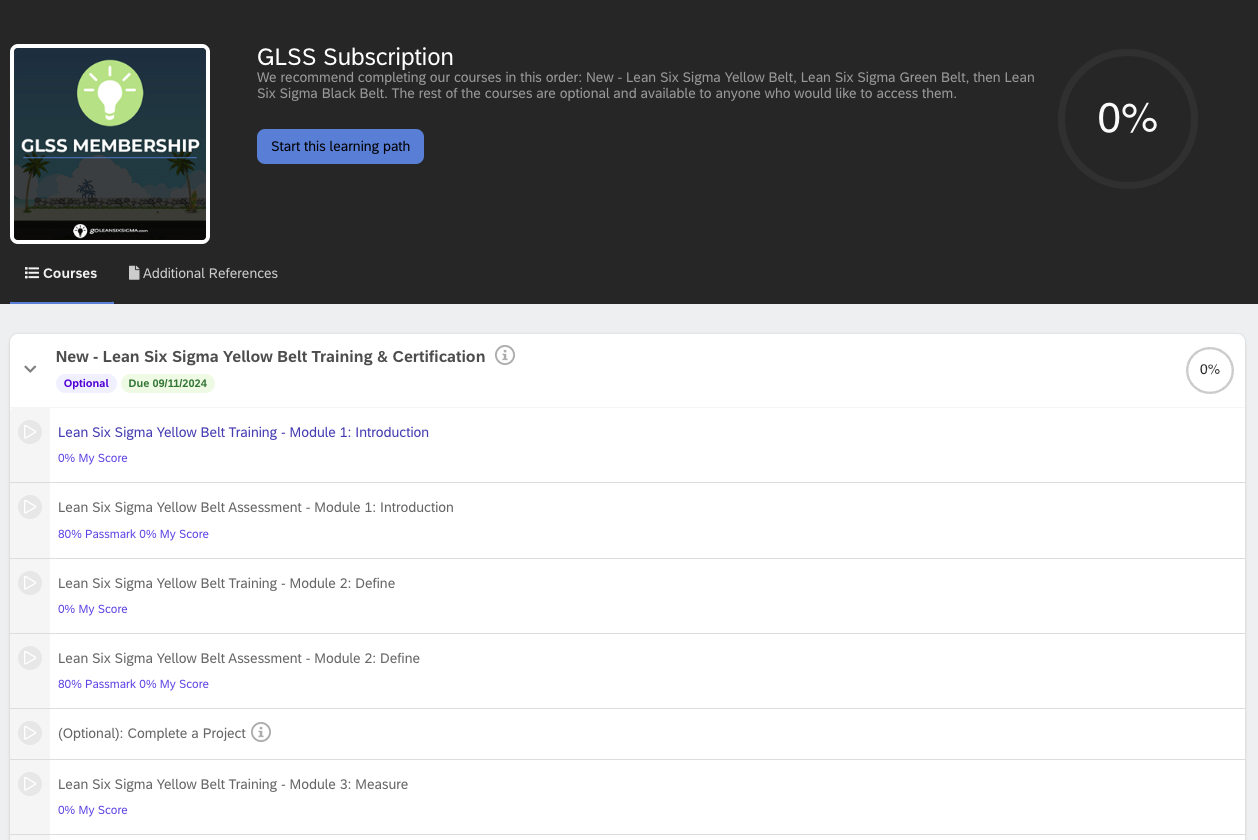
Open the accordion view by clicking on the name of the course. You can start your training by clicking directly on the first module of the course. (see screenshot)
Navigate through your training:
Use the buttons on the top right-hand side of the training to exit the training, navigate between modules, or share feedback.
Clicking the three lines will allow you to navigate through all the sub-modules within the course.